
Free Shipping on all orders $49+ at Peets.com
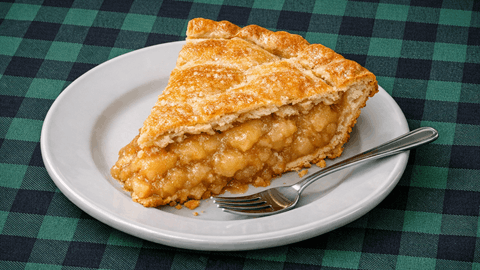
This quick & easy apple pie can be whipped together and ready to eat within an hour. It uses canned apple pie filling in addition to refrigerated pie crusts. Be sure to allow the pie to sufficiently cool in order to allow the filling to thicken. There’s something comforting about the smell of a freshly-baked apple pie that brings back memories you’ve long forgotten.

Most canned pie fillings already include the spices but they never add enough cinnamon and nutmeg. If you don’t add the additional apple pie spice, the filling will lack flavor and that wonderful aroma associated with an apple pie. You can always adjust the spices based on your personal preferences. If you love cinnamon, add an extra teaspoonful. If you love clove, add 1/2 teaspoon to make this recipe your own. If you’re interested in making your own apple pie spice, check out our article How To Make Your Own Apple Pie Spice.
Not mentioned in the instructions for this recipe is adding sugar to the top crust. This is a trick that experienced pastry bakers use all the time. When the pie is almost done baking, brush the top crust with butter and sprinkle with sugar. I know bakers who add coconut, shredded chocolate, and even butterscotch chips during the final few minutes of baking. Be sure to wait until the pie is almost done or the crust will be too dark.
Apple pie made with canned filling and a refrigerated crust is a classic shortcut that still delivers all the cozy flavor people expect from a homemade pie. The canned filling provides tender apple slices already coated in a warm, cinnamon‑spiced syrup, so the pie bakes up fragrant and comforting without any peeling or chopping. As it heats, the filling thickens and bubbles, creating that glossy, golden look that makes apple pie feel timeless and inviting. It’s a simple, reliable way to get that nostalgic apple‑pie aroma filling your kitchen in minutes.
Pairing the filling with a refrigerated crust makes the process even easier while still giving you a flaky, golden base that tastes buttery and homemade. The crust browns evenly, stays sturdy under the juicy apples, and provides just the right amount of crispness to balance the soft filling. Whether you top it with a regular or lattice crust, the pie comes out looking rustic and satisfying with very little effort. It’s the kind of dessert that works for holidays, weeknights, or any moment when you want something warm, familiar, and effortlessly delicious.
What You’ll Need To Make This Pie
Utensils & Equipment
- 9-inch deep dish pie plate
- Wire cooling rack
- Medium mixing bowl
- Spoon or spatula
- Set of measuring spoons
- Sheet of aluminum foil
Key Ingredients
- Canned apple pie filling
- Apple pie spice
- Butter
- Refrigerated pie crusts
Quick & Easy Apple Pie Recipe
Utensils & Equipment
- 1 medium bowl
- 1 9-inch deep dish pie plate
- 1 set of measuring spoons
- 1 wire cooling rack
- 1 sheet of aluminum foil
- 1 spatula or spoon
Ingredients List
- 2 cans 21 ounce apple pie filling
- 2 tsp apple pie spice
- 2 Pillsbury pie crusts

Instructions
Preheat Oven
- Preheat the oven to 425℉.
- Place a sheet of aluminum foil on the bottom rack to catch any juices that might bubble out of the pie while baking.
Prepare The Filling
- In medium mixing bowl stir together the pie filling and apple pie spice.
Fill The Crust
- Pour the filling into the bottom crust.
Top Crust
- Place the top crust over the filling.
- Crimp the edges of the bottom and top crusts together to create a scalloped look. You can also do a lattice crust if you know how.
- Cut 4 – 6 slits in the top crust to allow the goodness to vent during baking.
Bake
- Bake on medium rack at 425℉ for 15 minutes then reduce the temp to 350℉ and bake for an additional 40 – 45 minutes.
- Pie is done when top crust is golden brown and filling starts to bubble.
Cool It Down
- Place on cooling rack and allow to cool for at least two hours.
Notes
Free Shipping on all orders $49+ at Peets.com