
Free Shipping on all orders $49+ at Peets.com
This quick and easy peach pie recipe with canned peaches and refrigerated pie crusts can be put together in a mere 10 minutes. I was surprised to learn that there are more searches for recipes with canned peaches than for fresh peaches. Let’s be realistic. Most of the fresh peaches you’ll find at supermarkets are hard as a rock because they were picked way before they were ripe. They never fully ripen an often rot before they’re soft enough to eat. Canned peaches also provide consistent sweetness and texture year round, making them perfect for beginner bakers who want dependable results every single time.
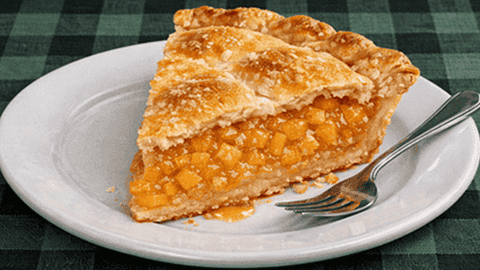
Most canned peaches are packed in syrup so you’ll need to add extra thickener to prevent the filling from coming out too juicy. The most common pie filling thickeners are flour, cornstarch, Clearjel and tapioca. You can usually spot these ingredients in the recipe. If your pies have been coming out too runny, check our article on How To Thicken Pie Fillings.
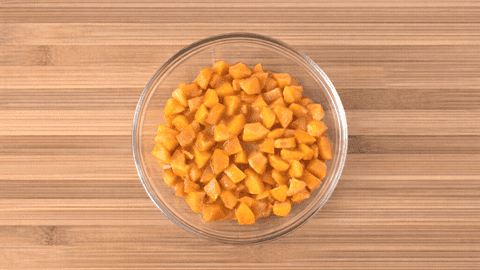
To prepare the peaches, first drain the juice from the cans. I usually just pour the peaches into a strainer or colander and allow them to drain for a few minutes while preheating the oven and preparing the bottom crust. Once the peaches have drained, you’ll want to cut or chop them into smaller pieces. I won’t bore you with the geometry involved but large pieces of fruit take longer to bake than smaller pieces. You want all of the pieces to be roughly the same size so they bake evenly.
Peach pie with canned peaches and a refrigerated crust is easy to make because both the fruit and the dough are already prepared for you, removing all the usual labor of peeling peaches, cooking down a filling, or mixing and rolling pie dough. The canned peaches should be chopped a little to make bite size pieces. After allowing the crust to sit at room temperature as directed on the box, it can be unrolled and fit into the pie plate without any fuss. With almost no prep work, no special technique, and very little cleanup, the pie comes together in minutes and bakes into a warm, golden, homemade‑tasting dessert with almost no effort at all.

While chopping the peaches you’ll notice that they’re still quite juicy. The peaches absorb the syrup they were packed in. Once you’re done chopping the peaches, drain them again, if necessary.
What You’ll Need To Make This Pie
Utensils & Tools
- 9-inch deep dish pie plate
- Wire cooling rack
- Large bowl
- Spoon or spatula
- Measuring cup
- Set of measuring spoons
Key Ingredients
- Refrigerated pie crusts
- Canned peaches
- Light brown sugar
- Cornstarch
- Lemon juice
- Ground cinnamon
- Ground nutmeg
Peach Pie Recipe With Canned Peaches
Utensils & Equipment
- 1 9-inch deep dish pie plate
- 1 wire cooling rack
- 1 spatula or spoon
- 1 knife to chop the peaches
- 1 measuring cup
- 1 set of measuring spoons
Ingredients List
- 2 refrigerated pie crusts
- 2 cans 14.5 ounce canned peaches some brands are 15-ounce cans
- 1 cup light brown sugar
- 1/3 cup cornstarch (or flour)
- 1 Tbsp lemon juice
- 3/4 tsp ground cinnamon
- 1/4 tsp ground nutmeg

Instructions
Preheat Oven
- Preheat oven to 350℉.
- Place a sheet of aluminum foil on the bottom rack, directly under where you'll be placing the pie. This is to catch any juices that bubble out while the pie is baking.
Prepare The Crust
- The crusts should sit at room temperature for 15-20 minutes or as directed on the package.
- Spray the pie plate with non-stick cooking spray and place the bottom crust in the pie plate.
Prepare The Filling
- In large bowl whisk together the flour, constarch, nutmeg, and cinnamon.
- Add the diced peaches and lemon juice.
- Mix with spoon or spatula until the dry ingredients completely coat the peaches.
Assemble The Pie
- Pour the mixture into the pie plate, making sure the peaches are level across the top.
- Add the top crust and crimp the edge if you want a scalloped look.
- Cut 4 – 6 slits in the crust to allow the filling to vent while baking.
Bake
- Bake at 350℉ for 60 minutes or until the crust is golden brown and the filling starts to bubble.
- The pie is not done until you can see the filling bubbling through the slits.
Notes
Free Shipping on all orders $49+ at Peets.com