
Free Shipping on all orders $49+ at Peets.com
“Homemade pie crust is often considered to be a labor of love. Chances are your first attempt will leave you frustrated with the results as well as the number of steps involved in perfecting that flaky crust. Have no fear. As they say, Rome wasn’t built in a day. You should be able to make the perfect crust without going bonkers and throwing flour all over the kitchen. With a little patience, cold ingredients, and a few simple techniques, each batch becomes easier to handle, roll, and bake. Before long, you’ll be turning out buttery, golden crusts that look and taste bakery worthy.”
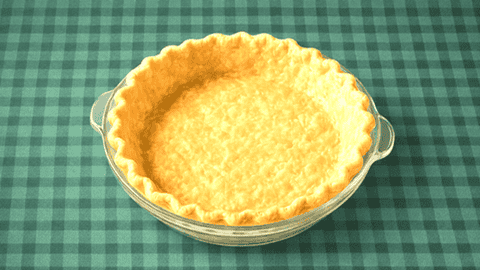

Flaky Crust Means Cold Ingredients
The ideal flakiness of your crust comes from using cold butter, leaving visible chunks of butter, and from handling the dough as little as possible. The butter should be FROZEN for at least 15 minutes, cut into tiny cubes and then frozen for another 10 minutes.. When kneading the dough, use a pastry cutter or fork, not your hands. The heat from your hands will melt the butter and all reduce the flakiness of the baked crust.
Ideally you should refrigerate the flour, salt, and sugar. Cold ingredients create the flakiness. You don’t want to add the frozen butter to dry ingredients that are at room temperature. This will cause the butter to start softening almost immediately. Freeze the butter and chill the dry ingredients. If there is a secret to crafting the perfect flaky crust, it’s to freeze the butter and chill everything else.
Homemade pie crust is the best because it has a flavor and texture that simply can’t be duplicated by anything pre‑made. When you cut cold butter into flour by hand, you create irregular pockets of fat that melt in the oven and form real, shattering flake—something store‑bought crusts rarely achieve. The taste is richer, cleaner, and more buttery, with no preservatives or stabilizers dulling the flavor. You control everything: the salt level, the thickness, the type of fat, even how rustic or refined you want the dough to feel. That control translates directly into a crust that tastes alive, warm, and deeply satisfying.
It’s also the best because it connects you to the craft of baking in a way that shortcuts can’t. Rolling out the dough, feeling its texture change under your hands, and seeing it brown beautifully in the oven gives the pie a sense of care and personality. A homemade crust supports the filling instead of just containing it—it stays crisp at the edges, tender underneath, and full of character. Every pie becomes uniquely yours, shaped by your technique, your ingredients, and your intention. That combination of flavor, texture, and personal touch is why homemade crust always stands out.
Frequently Asked Questions About Flaky Homemade Pie Crust
Why is my homemade pie crust not flaky?
The most common reason is that the butter became too warm before baking. Flaky layers form when cold butter melts in the oven and creates steam pockets inside the dough. Using frozen butter, chilled dry ingredients, and handling the dough as little as possible all help create a flaky texture.
Free Shipping on all orders $49+ at Peets.com
Should butter be frozen for pie crust?
Yes. Freezing the butter before mixing it into the flour helps prevent it from melting too quickly. Tiny cold chunks of butter are one of the secrets to achieving a light, flaky crust.
Can I make pie crust ahead of time?
Absolutely. The dough can be refrigerated for up to a few days before using. You can also freeze wrapped dough disks for longer storage and thaw them in the refrigerator before rolling out.
Why should pie crust dough rest in the refrigerator?
Resting the dough chills the butter again and allows the gluten to relax. This makes the dough easier to roll out and helps prevent shrinking during baking.
Can I use my hands to mix pie crust dough?
It’s better to use a pastry cutter or forks instead of your hands. The warmth from your hands can soften the butter too much, reducing the flakiness of the finished crust.
What type of flour works best for homemade pie crust?
All-purpose flour is ideal for a traditional flaky pie crust because it provides the right balance of structure and tenderness.
Why do I need ice water for pie crust?
Ice water keeps the butter cold while helping the dough come together. Warm water can soften the butter too early and affect the texture of the crust.
How do I know when pie crust dough is mixed enough?
Stop mixing once the dough just begins to hold together and you can still see small pea-sized pieces of butter. Overmixing develops too much gluten and can make the crust tough.
Can I freeze homemade pie crust?
Yes. Pie crust dough freezes very well. Wrap the dough tightly in plastic wrap and store it in a freezer-safe bag or container until ready to use.
Why does my pie crust shrink during baking?
Pie crust often shrinks when the dough is overworked or not chilled long enough before baking. Allowing the dough to rest in the refrigerator helps reduce shrinking.
Is homemade pie crust better than store-bought?
Many bakers prefer homemade pie crust because it has a richer buttery flavor, flakier texture, and no preservatives. Homemade crust also gives you complete control over the ingredients and thickness.
How thick should I roll out pie crust dough?
Most pie crust dough should be rolled into a circle about 12 inches wide and roughly 1/8 inch thick for a standard pie plate.
What You’ll Need To Make This Crust
Utensils and Equipment You’ll Need
- Large bowl
- Pastry cutter or 2 forks
Rolling Pin - Plastic wrap
Key Ingredients
- All purpose flour
- Salt (preferably fine grain)
- Granulated sugar (optional)
- Butter (cold (but preferably frozen)
- Water
Flaky Homemade Pie Crust
Utensils & Equipment
- 1 large bowl
- 1 pastry cutter or 2 forks
- 1 Rolling Pin
- plastic wrap
Ingredients List
- 2 1/2 cups all purpose flour
- 1/2 cup all-purpose flour for rolling the dough
- 1 tsp salt preferably fine grain
- 1 tsp granulated sugar (optional)
- 2 sticks butter cold (or even frozen)
- 1/2 cup ice water

Instructions
Most Important Step
- Freeze the butter and refrigerate the dry ingredients for a minimum of 15 minutes.
Prepare The Butter
- The easiest method to prepare the butter is to cut it into tiny cubes. Once done, be sure to freeze the butter for at least 10 minutes.
Mix The Dry Ingredients
- In a large bowl whisk together the 2 1/2 cups of flour, salt, and sugar if you're adding it. The sugar is optional.
Add The Butter
- Add the butter to the dry ingredients. Blend together with a pastry cutter or fork. Do not use your hands as the heat from your hands will soften the butter.
- Add the ice water one tablespoon at a time. Continue blending until you can see pea-sized chunks of the butter. DO NOT OVER BLEND,
- Stop mixing when the dough starts to hold together.
Refrigerate The Dough
- Divide the dough into two flat disks and wrap in plastic.
- Refrigerate for at least 1 hour. This hardens the butter and allows the gluten in the dough to rest.
Roll The Dough
- On a floured surface, roll the dough into circles roughly 12" round.
Refrigerate The Crusts
- Many bakers skip this step. After rolling the dough into circles, wrap separately in plastic and refrigerate for at least an hour. If you're short on time, you can skip this step. Your crust will still be 100% better than the premade ones.
Prepare The Pie
- Layer the pie plate with the bottom crust.
- Add your pie filling
Top Crust
- For a regular top crust, lay it over the pie and crimp the edges together to create a scalloped look.
- For a lattice top crust. cut the dough into strips and lay over the top of the pie.
Nutrition
Free Shipping on all orders $49+ at Peets.com